
- What Perfex CRM e-signature covers
- Step 1: Open the Perfex CRM e-signature settings
- Step 2: See what the customer sees
- Step 3: The customer signs with Perfex CRM e-signature
- Step 4: Read the result
- Step 5: Contracts have their own signature window
- When to use Perfex CRM e-signature
- Tips for signing
- Frequently asked questions
A customer can accept a price without printing, signing and scanning anything. Perfex CRM e-signature lets a customer draw a signature on the screen and confirm who they are. This guide, tested on Perfex CRM 3.4.1, shows the settings, what the customer sees on an estimate and a contract, and where you read the result.
What Perfex CRM e-signature covers #
The CRM has a signature window with the title Signature & Confirmation Of Identity. It asks for a first name, a last name, an email address and a drawn signature. The settings page offers it for proposals and estimates. Contracts have their own Sign button with the same window. The settings page has no option for invoices, so an invoice cannot be signed this way. Perfex CRM e-signature records who signed and when, but it is not legal advice, so ask a lawyer if you need to know how it counts in your country.
Step 1: Open the Perfex CRM e-signature settings #
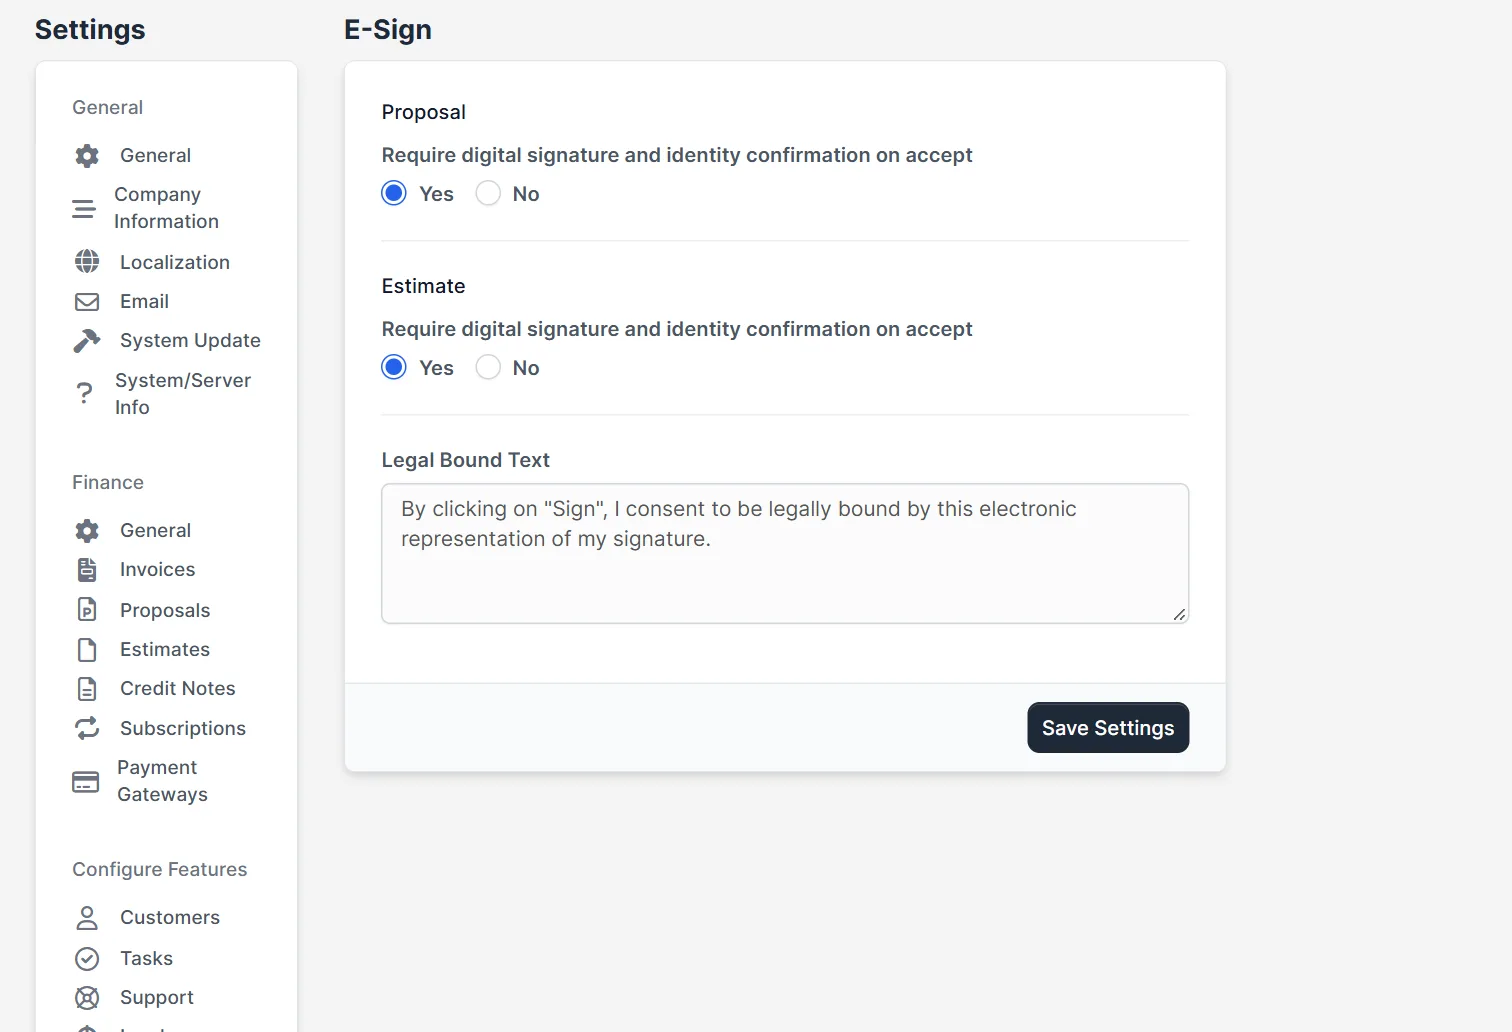
Open Setup > Settings and choose E-Sign under Other. Two blocks show: Proposal and Estimate. Each has the question Require digital signature and identity confirmation on accept with Yes and No. Set Yes for the documents where you want a signature. Below them, the field Legal Bound Text holds the sentence next to the signature. The default text says that by clicking Sign the person consents to be legally bound by the electronic representation of their signature. Change the legal bound text if your lawyer wants other words, then click Save Settings.
Step 2: See what the customer sees #
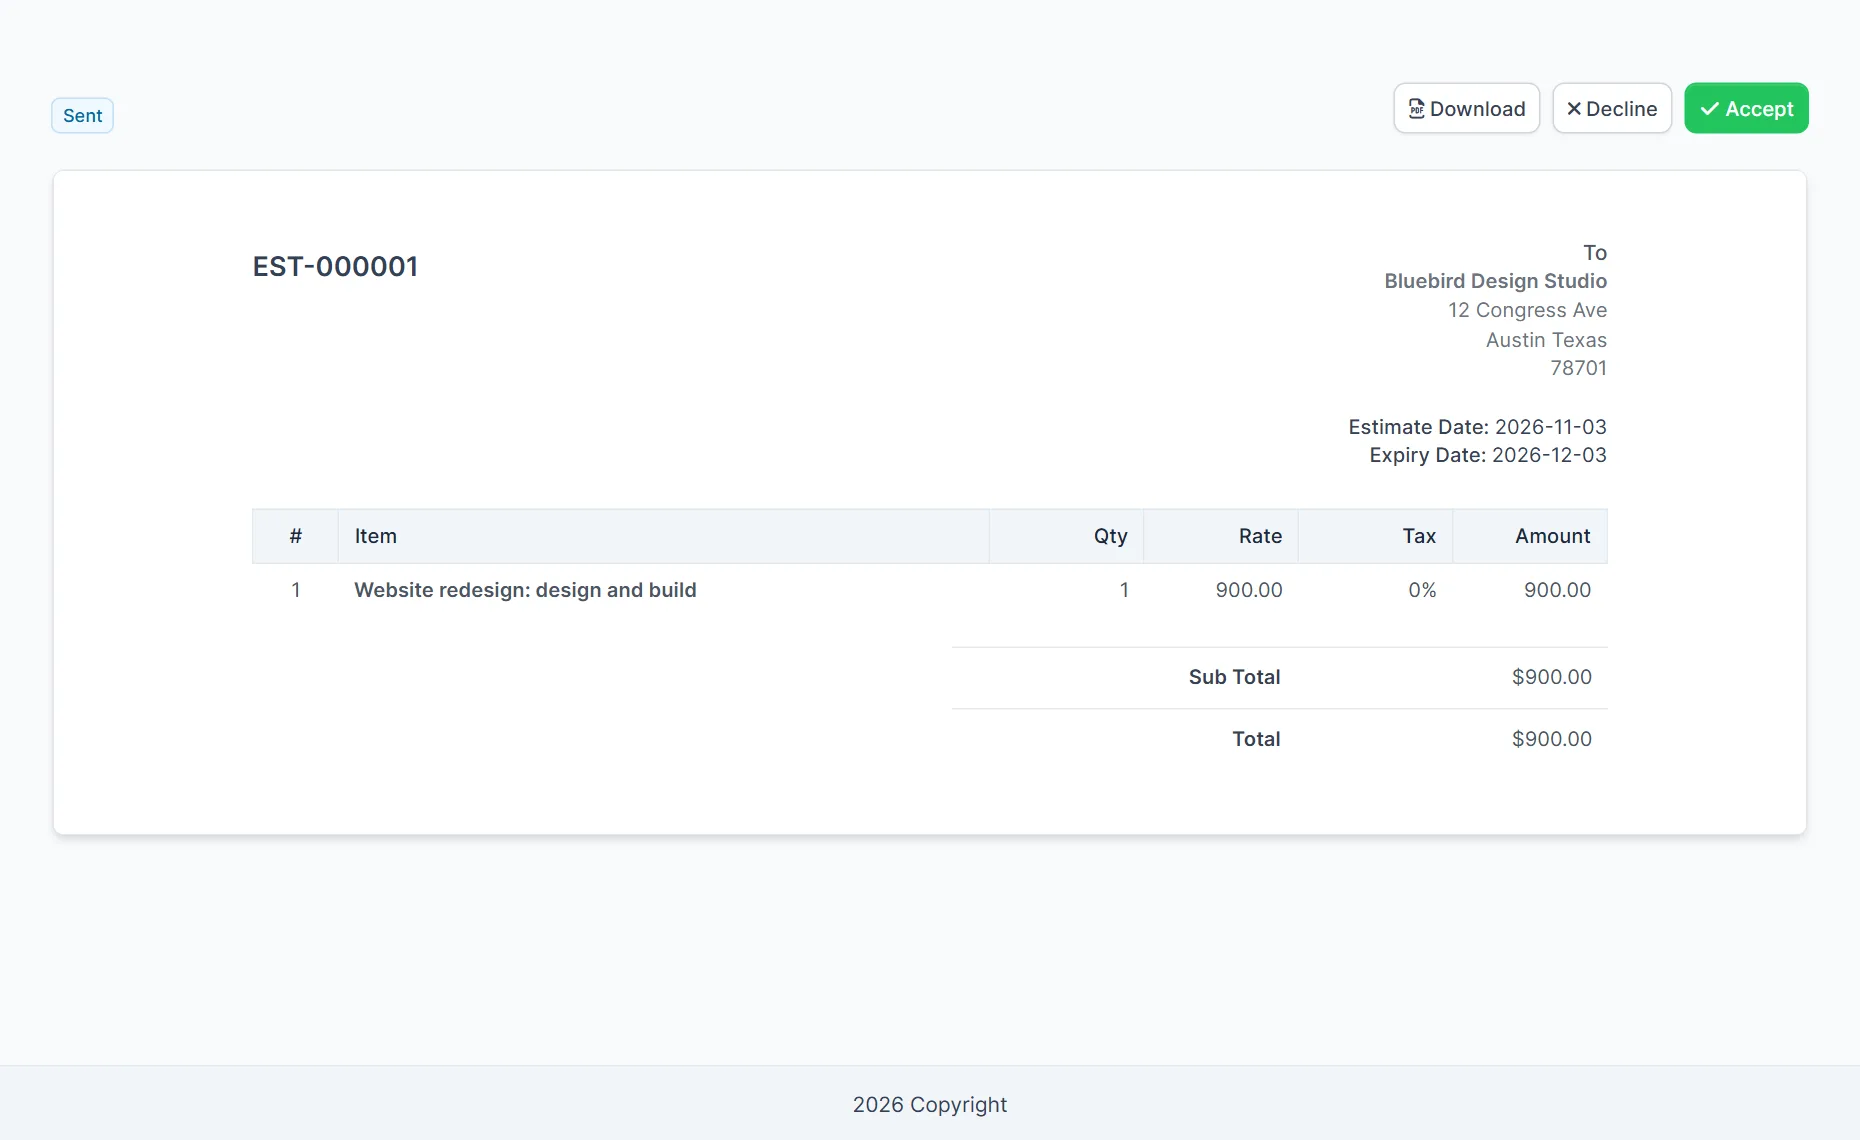
The customer opens the link of the estimate. The top shows the status, here Sent, and three buttons: Download, Decline and Accept. With the signature option off, Accept is a single click. With it on, Accept opens the signature window. See Perfex CRM estimates for how to send the link.
Step 3: The customer signs with Perfex CRM e-signature #
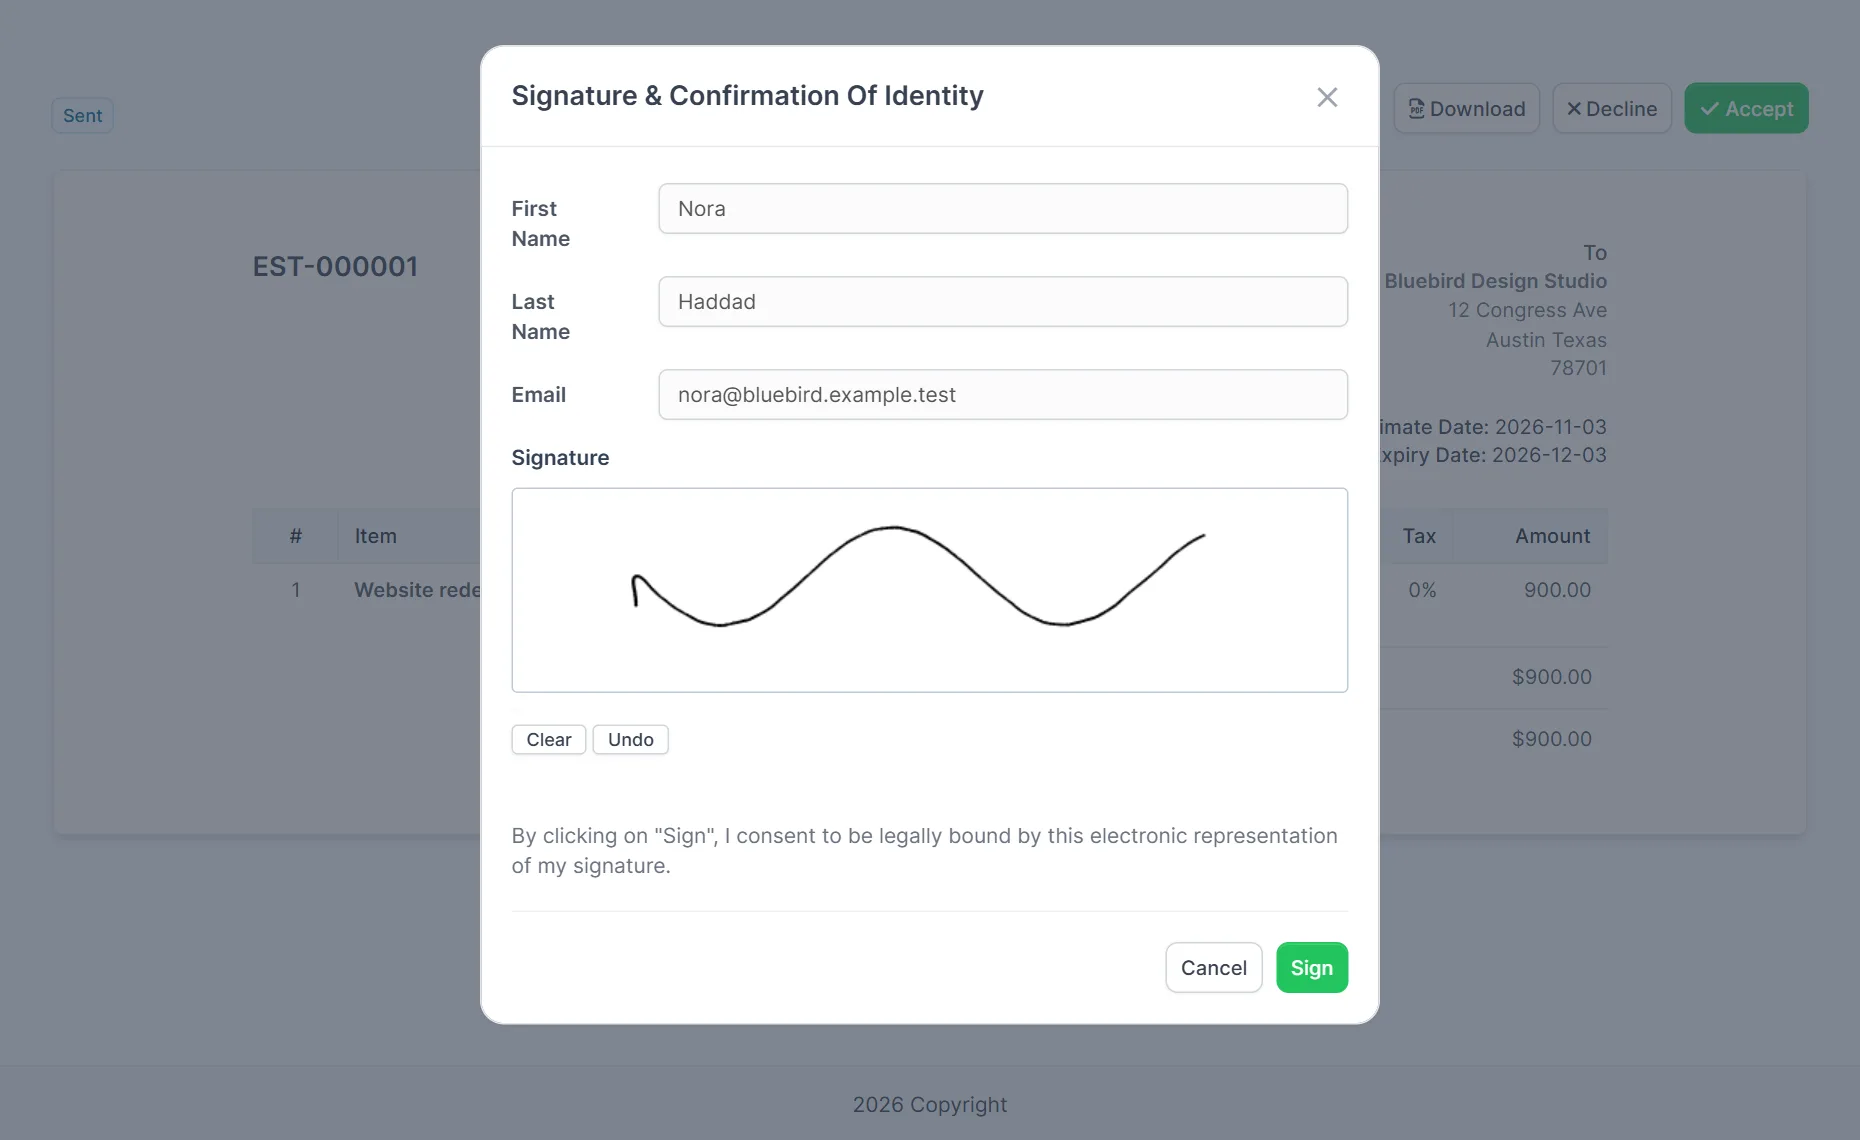
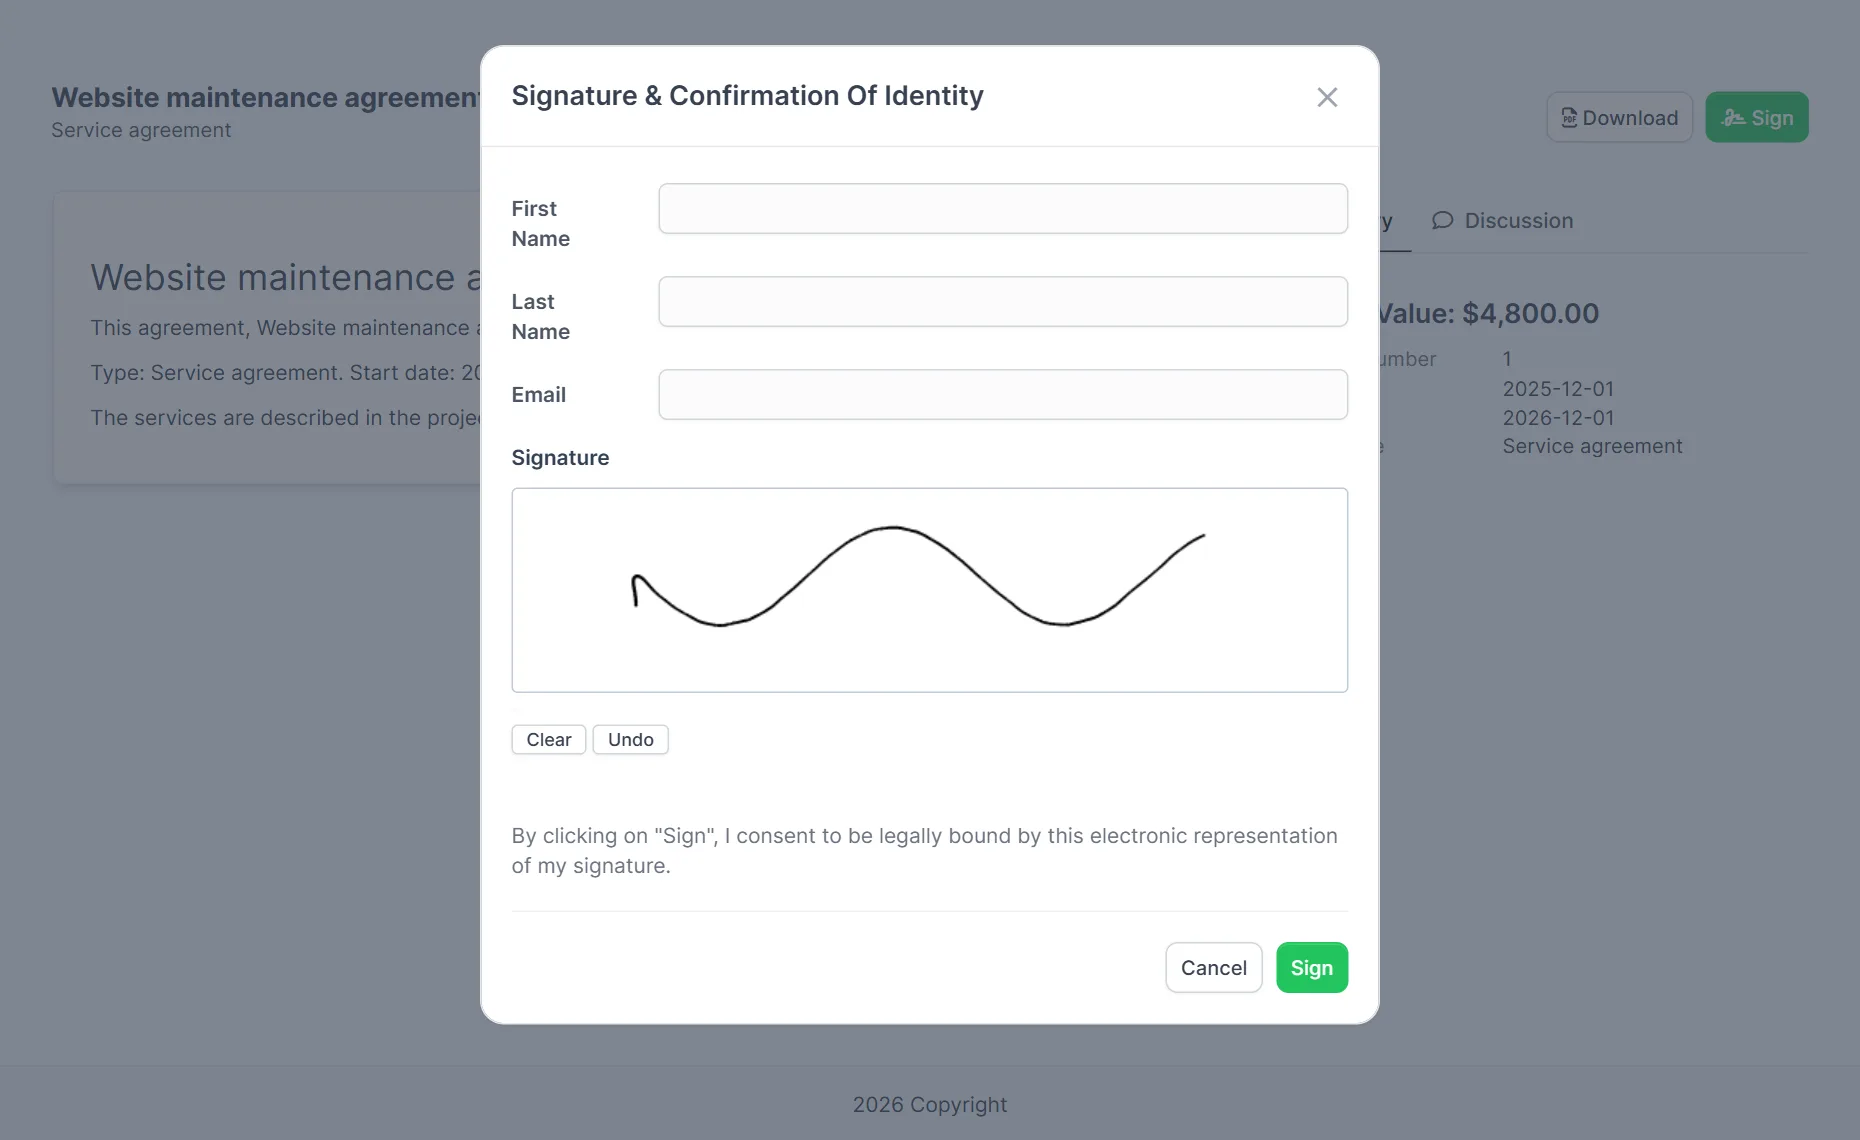
With the option on, a click on Accept opens the window Signature & Confirmation Of Identity. The customer types the first name, last name and email address, draws the signature in the box with the mouse or a finger, and reads the legal bound text. Clear and Undo fix a bad line. Cancel closes the window, and Sign sends it. In our test, we drew a signature on an estimate and clicked Sign.
Step 4: Read the result #
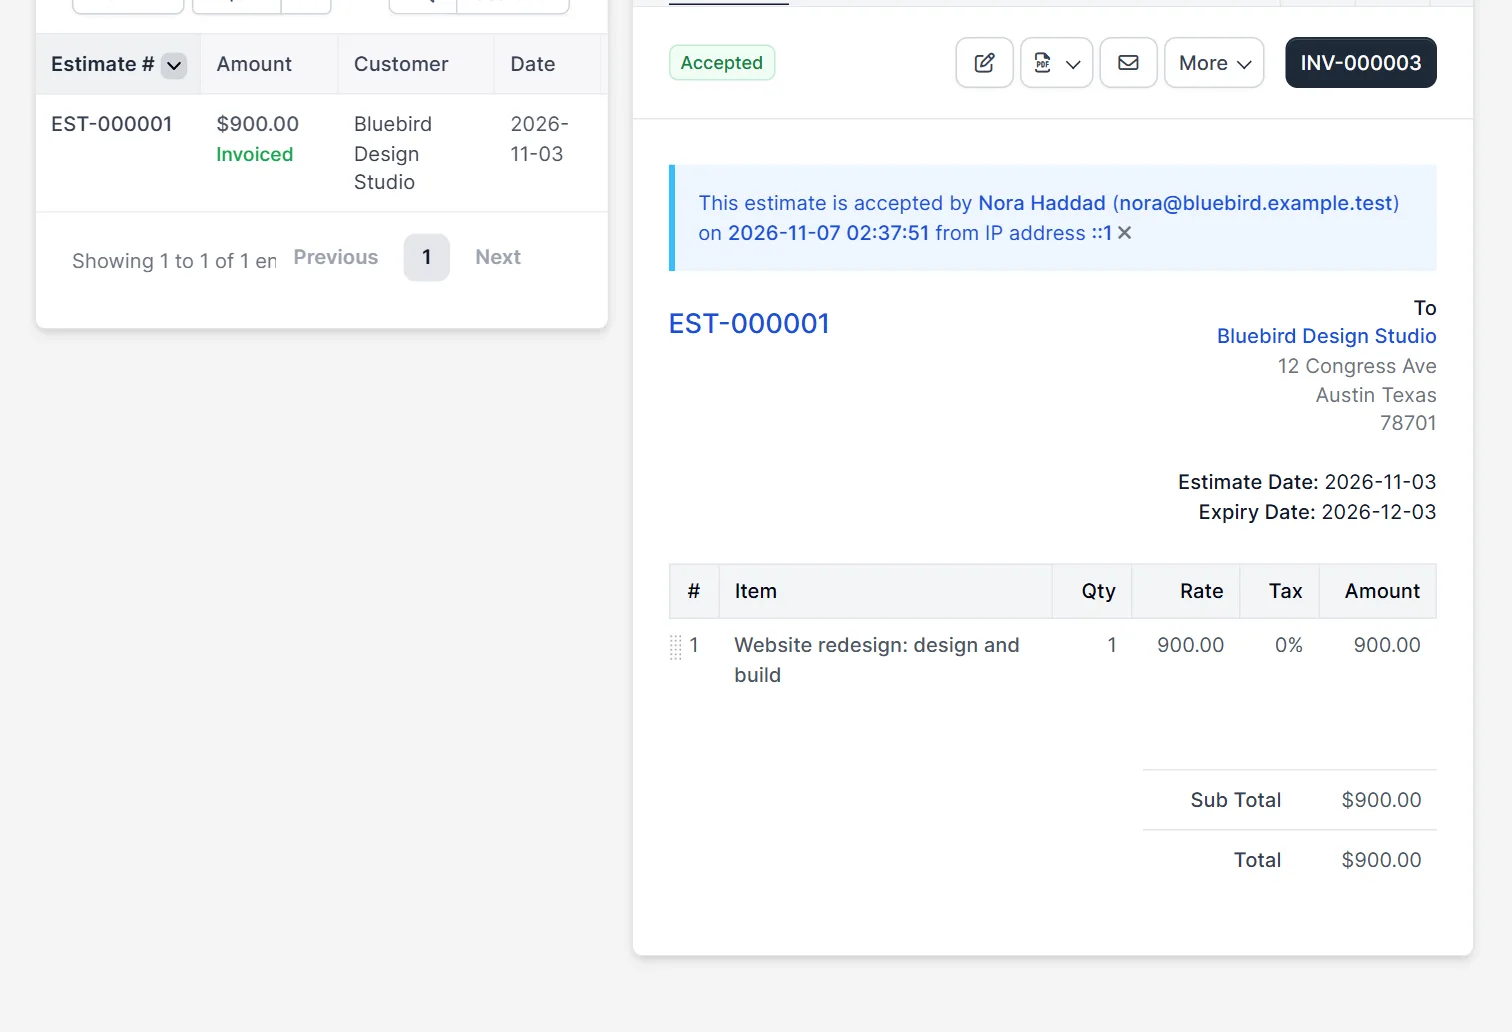
Perfex CRM e-signature leaves a clear trace: the estimate in the admin area now has the status Accepted. A blue line above it says who accepted it, with the name, the email address, the date and time and the IP address of the visitor. In our test it named the customer contact and the time of the signature. The estimate list shows the result as well, so you can see which quotes are won. Then create the invoice from the accepted estimate.
Step 5: Contracts have their own signature window #
Open a contract as the customer. The page has a green Sign button next to Download. A click opens the same window with the fields for the name, the email address and the signature pad. We opened it and drew a signature, but we did not send it. After a customer signs a contract, the contract list shows the signature column and the contract counts as signed. Read Perfex CRM contracts and Perfex CRM contract templates to prepare the text.
When to use Perfex CRM e-signature #
Use Perfex CRM e-signature where a yes must be provable: a quote that starts a project, a contract with a price, or a proposal with terms. For a small estimate that a customer accepts by email anyway, the plain Accept click may be enough. The more money is at stake, the more a drawn signature, a name and an IP address are worth. Keep the legal bound text short and clear. Tell customers in your email that they will be asked to sign.
Tips for signing #
- Test the whole Perfex CRM e-signature flow with your own email address before you send a real quote.
- Switch the option on for proposals and estimates separately, because each has its own setting.
- Check that the customer can reach the link from a phone, because many people sign with a finger.
- Read the legal bound text once a year with your lawyer.
- Look at Perfex CRM proposals for the proposal flow.
Not tested here: accepting a proposal with a signature, sending the contract signature, the signature in the PDF, and the emails that follow an acceptance. Read the official Perfex CRM help for more.
Related module: Signed documents need a home. The Document Management Module for Perfex CRM covers the whole life of a document, from draft to archive.
Frequently asked questions #
Where do I set up Perfex CRM e-signature? #
Open Setup, Settings, E-Sign. Set Yes under Require digital signature and identity confirmation on accept for proposals and estimates, and save.
What does the customer have to enter? #
A first name, a last name, an email address and a drawn signature in the Signature & Confirmation Of Identity window.
Where do I see who signed? #
Open the accepted estimate. A line above it names the person, the email address, the time and the IP address.
Can customers sign contracts? #
Yes. The contract page has a Sign button that opens the same signature window.


