
- What Perfex CRM lead email integration does
- Step 1: Enter the IMAP details
- Step 2: Choose the folder and the schedule
- Step 3: Set the defaults for new leads
- Step 4: Choose who is notified
- Step 5: Test the connection and save
- Step 6: Add spam filters
- Tips for lead email integration
- Frequently asked questions
Perfex CRM lead email integration reads a mailbox over IMAP and turns each new email into a lead, so enquiries sent to info@ or sales@ land in your CRM without typing. This guide, tested on Perfex CRM 3.4.1, shows the settings, the defaults for new leads and the spam filters.
What Perfex CRM lead email integration does #
With Perfex CRM lead email integration, the CRM logs in to the mailbox on a schedule and creates a lead for each email it has not seen. The sender becomes the lead, and the message goes into the lead. You find the page under Setup > Leads > Email Integration. The check runs through the cron job, so see Perfex CRM cron job.
Step 1: Enter the IMAP details #
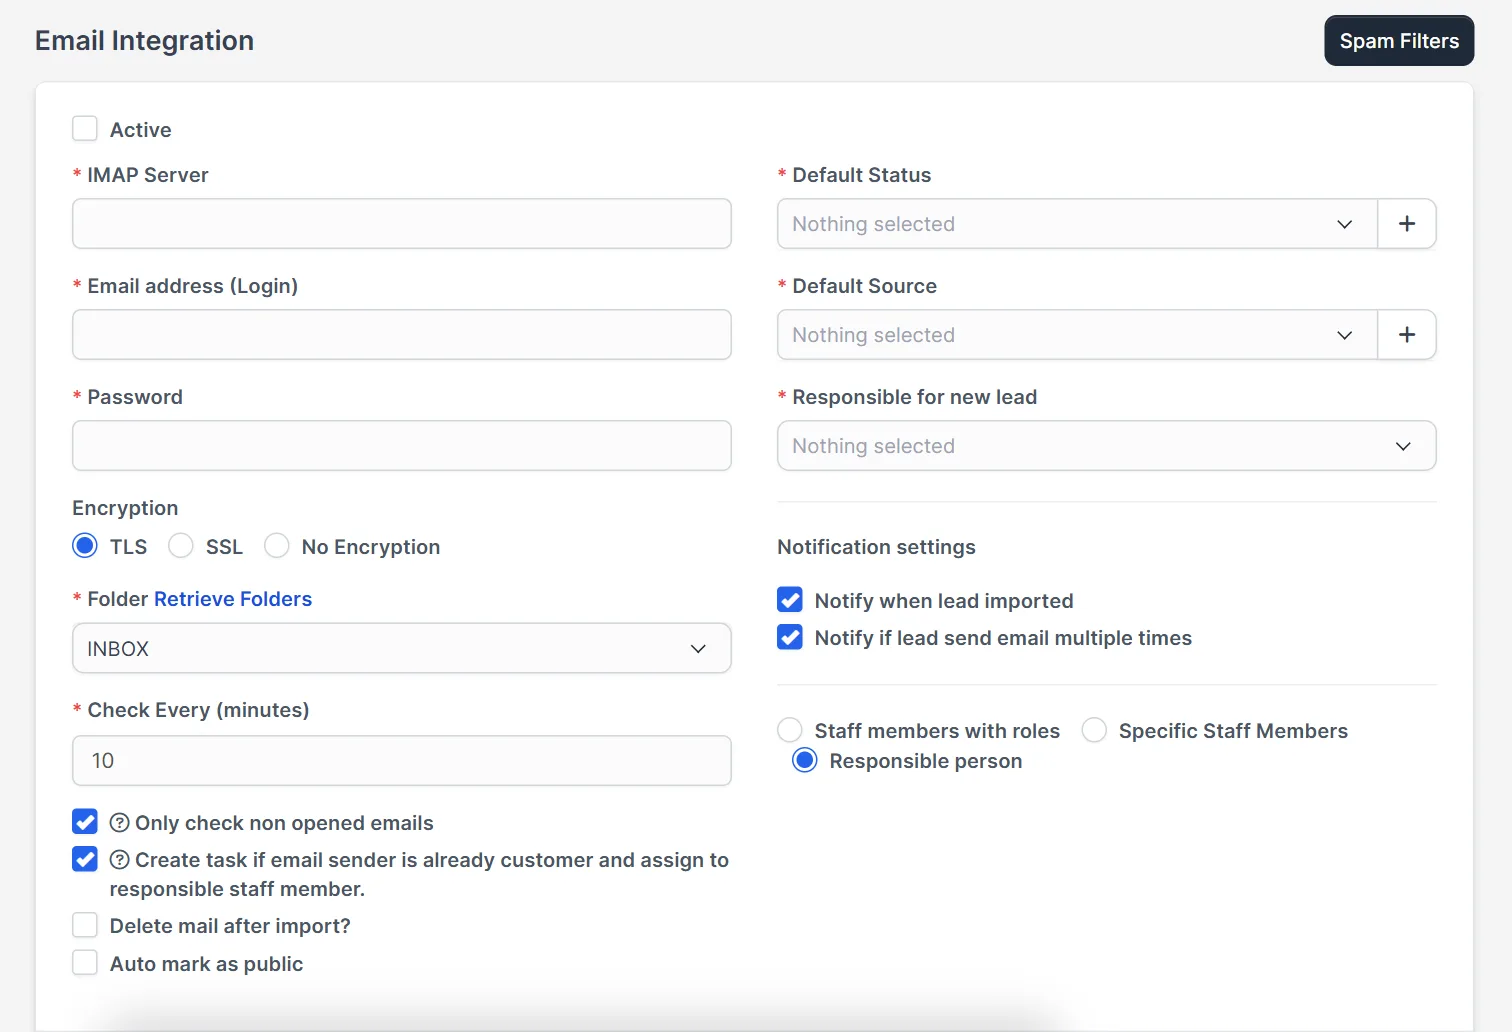
Perfex CRM lead email integration starts here. Tick Active and fill the IMAP Server (for example imap.yourhost.com), the Email address (Login) and the Password. Choose the Encryption: TLS, SSL or No Encryption. Use a mailbox that you made for leads only, not your personal one.
Step 2: Choose the folder and the schedule #
Click Retrieve Folders to load the folders of the mailbox and pick one, usually INBOX. Check Every (minutes) sets the schedule and starts at 10. Two options control what is read: Only check non opened emails and Delete mail after import?. Keep the delete option off until you trust the setup.
Step 3: Set the defaults for new leads #
On the right, choose the Default Status, the Default Source and the Responsible for new lead. A plus button next to status and source adds a new one. See Perfex CRM lead sources for sources, and Perfex CRM add lead for the lead form.
Step 4: Choose who is notified #
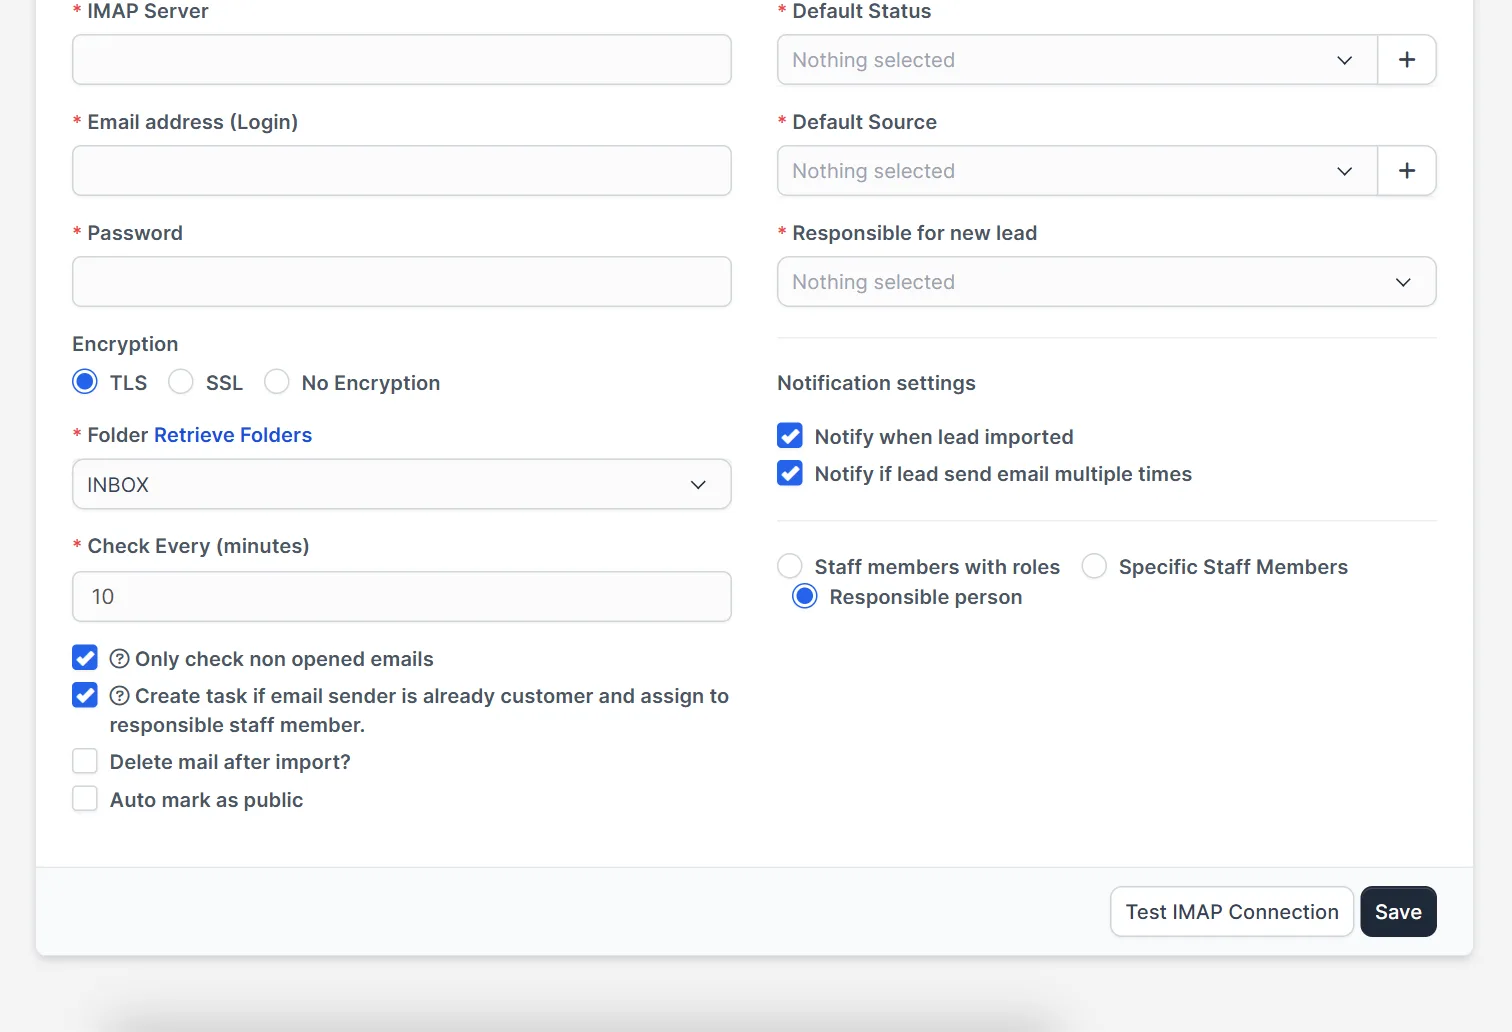
Under Notification settings tick Notify when lead imported and Notify if lead send email multiple times. Then pick who gets the alert: Staff members with roles, Specific Staff Members or the Responsible person. The option Create task if email sender is already customer opens a task for the responsible staff member when an existing customer writes.
Step 5: Test the connection and save #
Click Test IMAP Connection before you save the Perfex CRM lead email integration. If it fails, check the server name, the port rules of your host and the password, then click Save.
Step 6: Add spam filters #
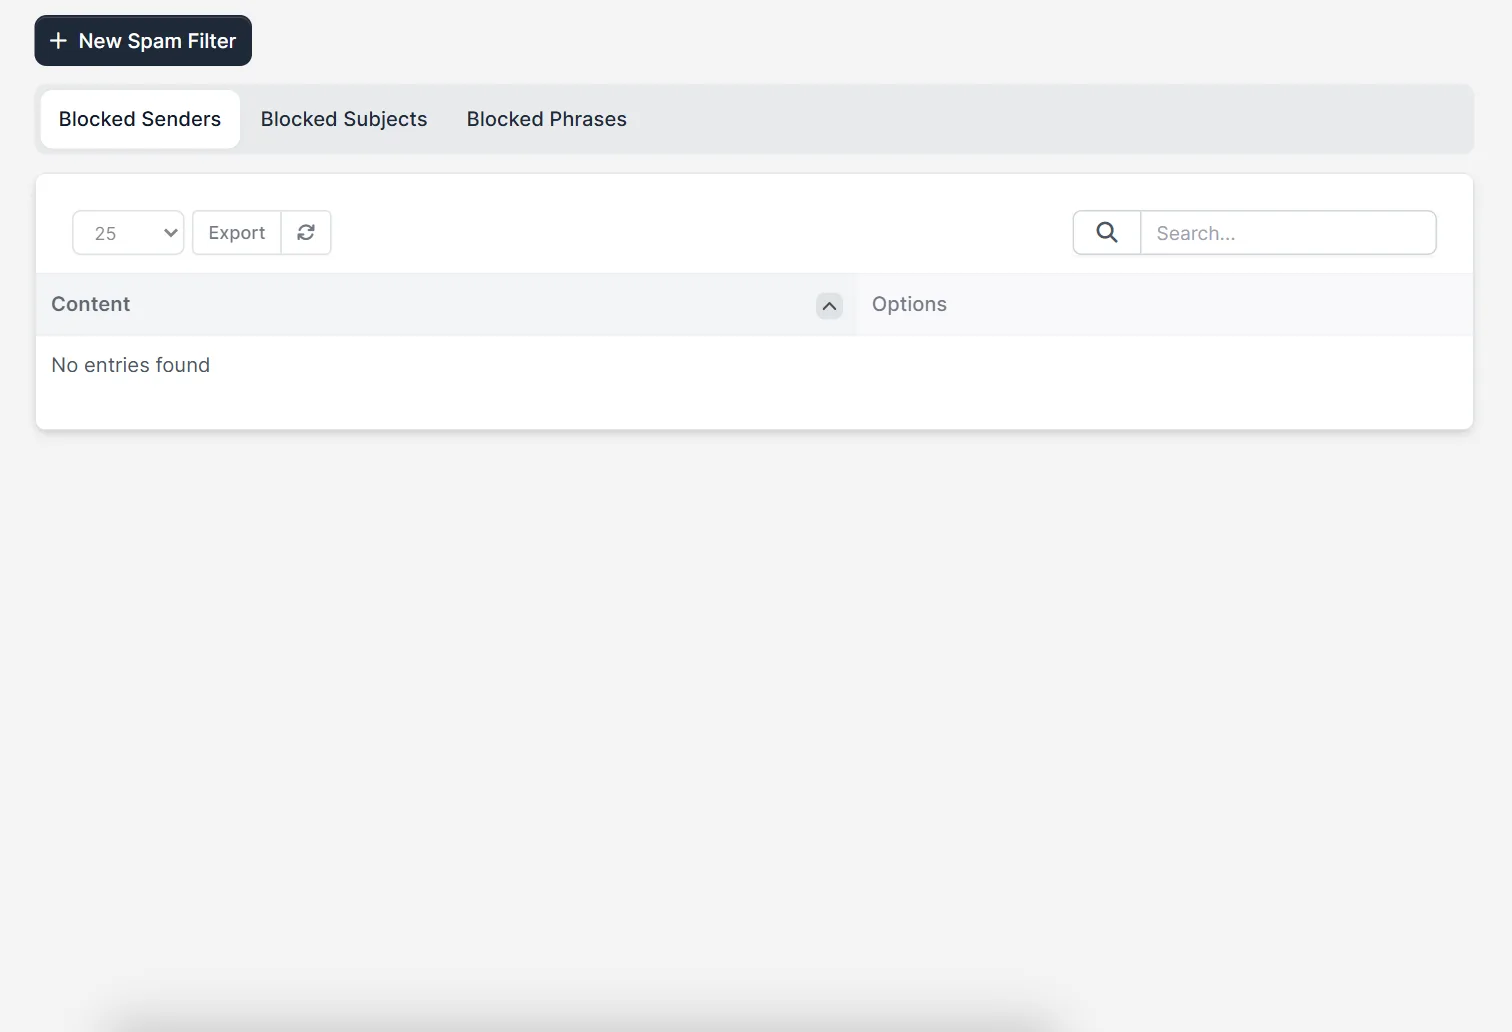
Click Spam Filters in the top corner. The page has three tabs, Blocked Senders, Blocked Subjects and Blocked Phrases, and a New Spam Filter button. Emails that match a filter do not become leads.
Tips for lead email integration #
- Send a test email from another address and wait for the next check.
- Use an app password if your mail provider has two step login.
- Check the Perfex CRM lead email integration again after a mail provider changes its security rules.
- Add obvious spam senders to the filters on the first day.
- Check the lead list after one day, and the cron job if nothing arrives.
- Do not point the integration at a mailbox that people also read, because it can mark mail as read.
Not tested here: a live connection to a mailbox, because the demo CRM has no real mailbox. The fields and buttons are real. Read the official Perfex CRM help for provider notes.
Related module: After Perfex CRM lead email integration is running, the Mailbox Module lets you read and answer those emails inside the CRM and convert them into tickets or leads.
Frequently asked questions #
Where is the lead email integration in Perfex CRM? #
Open Setup, Leads, Email Integration.
Does it need the cron job? #
Yes. The mailbox is checked by the cron job, so make sure cron runs.
Can I use Gmail for IMAP leads? #
Usually yes, with IMAP turned on and an app password. Check your provider settings.
How do I stop spam from becoming leads? #
Add the sender, subject or phrase in Spam Filters.


